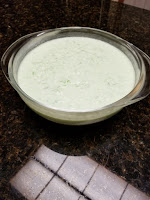
I have a file folder of recipes I've collected over the years. Many of them I've yet to try and many of them I made quite a few times. Some I've learned to make from my Nutritional Education class senior year in high school. Others I've learned to make from friends and family. There's some I've clipped from magazines, newspapers and coupon ads...then there are some, like this recipe, that I have no idea where it came from. I do know I've made it for my family during Thanksgiving and Christmas, but probably not since the late 80s/early 90s. When I made it again this Christmas, I did some tweaking to the original recipe. It is still just as good but not nearly as sweet. Keep in mind it is still quite sweet, but no one needs as much of a sugar rush as the original recipe!
The recipe is on an old sheet of loose leaf paper that is now yellowing and the pencil is fading so I thought I should blog this recipe so I don't lose it! Here's what I found in my file folder extra scribbles on the paper and all.
My mom and I had fun making this together so I could take photos of the process for this blog.
7-Up Salad...the recipe
Please note this takes overnight to set, so this isn't a make and instantly serve recipe.
1 small box of sugar free lime gelatin
20 oz. can of crushed pineapple (drained well)
1/2 cup granulated sugar substitute or sugar
1/2 cup 7-Up (or your favorite lemon-lime soda)
1/2 cup water
1 envelope of Dream Whip whipped topping mix
1/2 cup of cold 1% milk
1/2 teaspoon vanilla extract
8 oz. bar of Neufchâtel cheese softened (or cream cheese but we're trying to somewhat watch the calories here)
Start by draining the crushed pineapple and measuring your sugar substitute, 7-Up and water.
In a small sauce pan, pour in the gelatin and add the sugar substitute.
Add in the 7-Up (which will fizz quite a bit) and the water.
Add the crushed pineapple, put the pan on medium-high heat and stir constantly.
Keep stirring until this mixture is brought to a boiling point. Please note, you are not going to boil this mixture. As soon as it starts to boil, take it off the heat and let it cool.
Now it's time to make the Dream Whip. Empty a packet of Dream Whip into a small bowl.
Measure 1/2 cup 1% cold milk and add it to the bowl.
Measure 1/2 teaspoon vanilla extract and add it to the bowl as well.
Beat this mixture until soft peaks form.
In a medium sized bowl (the bowl in which you will be combining all of the ingredients to set overnight). Drop in the box of softened Neufchâtel and beat well.
Next, fold in the Dream Whip to the cheese until well combined. There may be some small lumps of cheese which is okay, just make sure you don't have large chunks.
Take the cooled gelatin mixture, and fold it in to the cheese and Dream Whip mix until well combined.
Refrigerate overnight.
When you are ready to serve, it should be the consistency of a creamy gelatin. You can add a dollop of whipped cream on top or serve as is (as I do).
Serves 6-8.
I hope you enjoy as much as I do!


